Whenever you upgrade the memory on a Windows Cloud Server, you’ll notice that, although the memory has increased, the disk space has not. This happens because the hypervisor uses a sparce disk file for the virtual hard drive on Windows instances. Since the hypervisor is unable to access the partition structure inside this file directly, the additional drive space that is allocated to your server after the resize must be manually managed within the OS itself.
**DISCLAIMER**
Before making any changes to your partition structure, make sure you take a backup! Any kind of mistake or problem during this process will render your machine unusable!
Windows 2008
On Windows 2008, this can be accomplished quite easily with the built-in tools. After the resize operation has been completed and the Rackspace control panel has asked you to verify the integrity of your server, you can follow these steps to expand the partition:
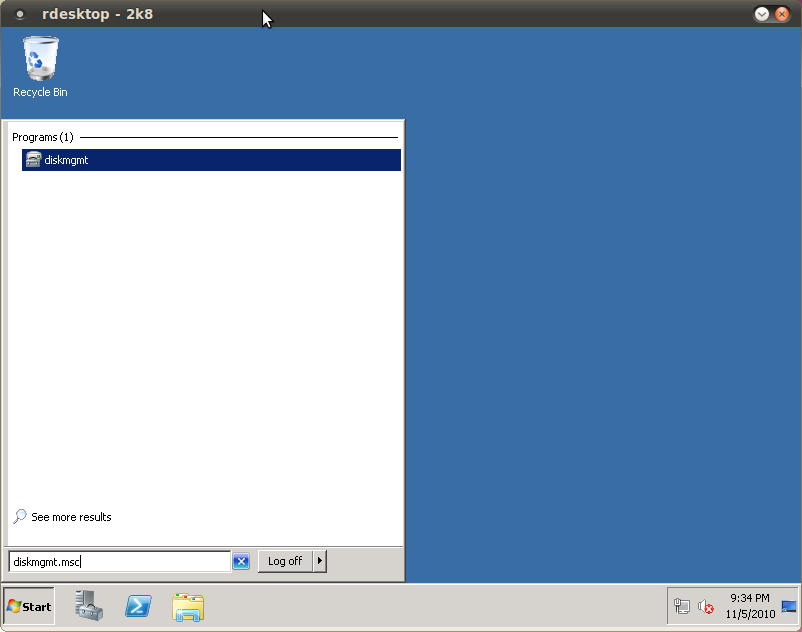
First, go to start -> search and type in “diskmgmt.msc”.
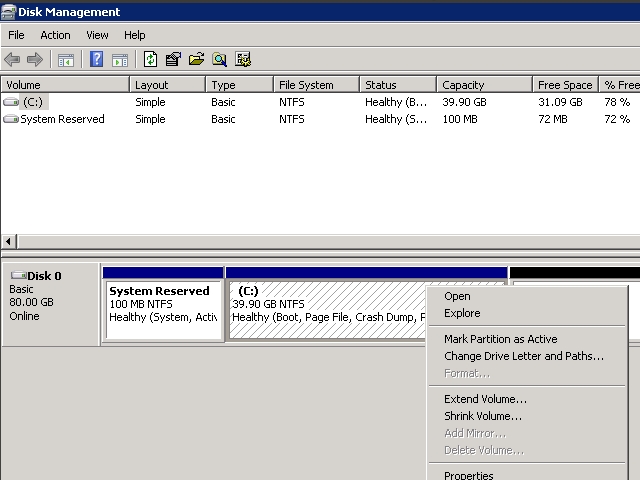
Next, right click on your C: drive and go to “Extend Volume”. The Extend Volume Wizard should open up on-screen.
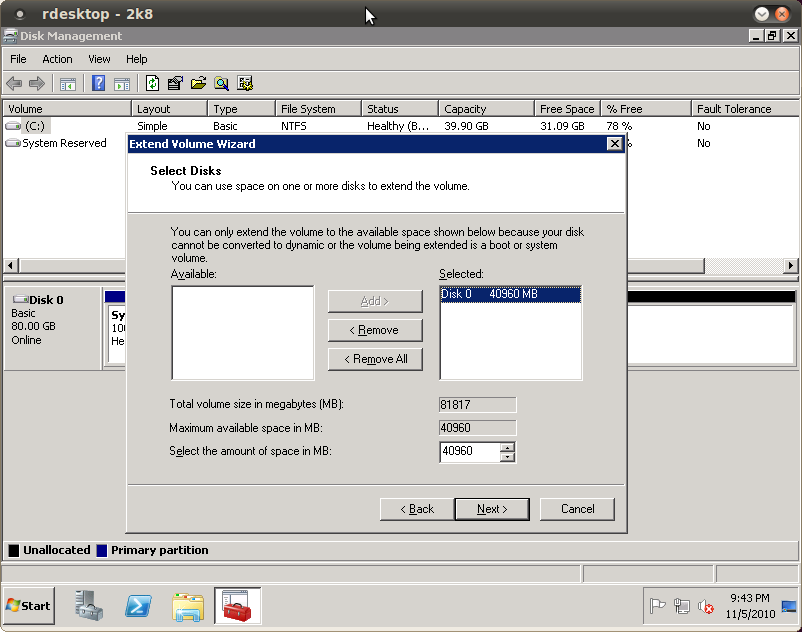
If you simply leave the default options and choose “Next” through the whole wizard, it will expand your C: drive to the maximum capacity now available to you.
Congratulations! That’s all there is to it on Windows 2008. Your C: drive should now be the appropriate size.
Windows 2003
Unfortunately, there’s no quick and easy way to accomplish the same result under Windows 2003. The built-in partition manager will not allow you to extend the C: partition across the extra unallocated space. You basically have two options at this point:
1.
Create a new partition on the unallocated space. This will at least give you access to the additional disk space, but because it won’t be contiguous this may not be an acceptable solution for your deployment.
2. Use a third-party tool such as to resize the partition. Neither myself or any other administrator that I have asked is aware of any free tools which are able to accomplish this on Windows 2003, unfortunately.
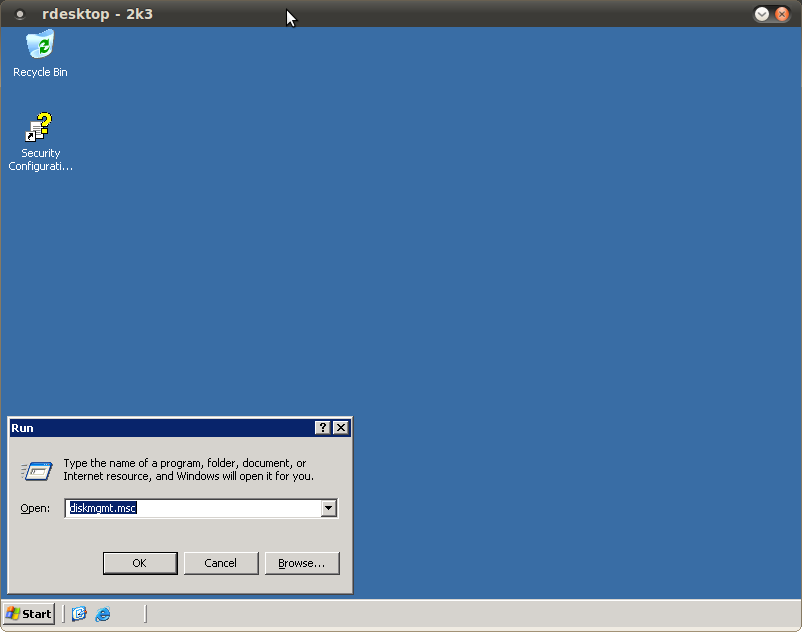
The steps to accomplish the first option are very similar to the above steps for Windows 2008. First, go to Start -> Run and type in “diskmgmt.msc”
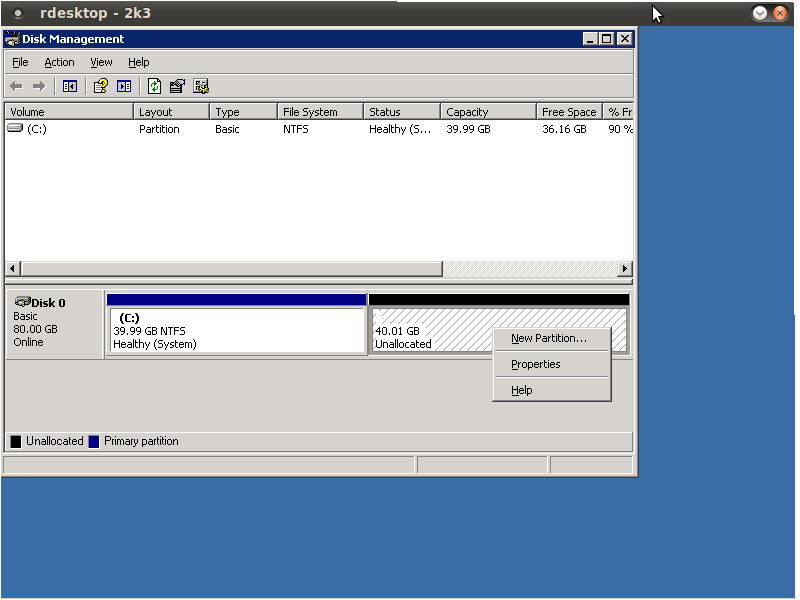
Next, right click on the unallocated space and go to “New Partition”
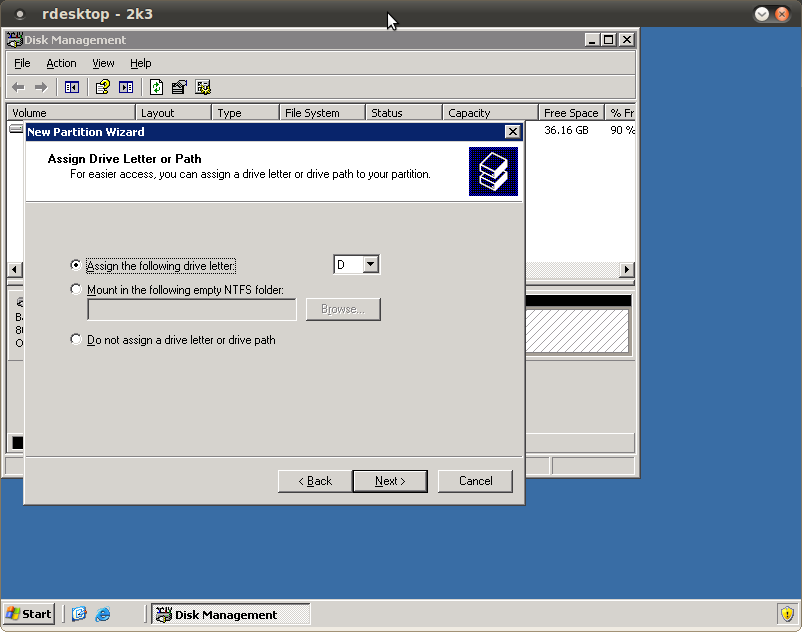
If you just hit Next through the wizard and keep all the defaults, it will automatically create a new partition utilizing all of the unpartitioned space for the new drive. You can assign whatever drive letter you choose for the new partition, if you so choose.
If you are using this server for FTP or some other form of regular file storage, this may be an acceptable solution. However, the more likely scenario if you are out of disk space is that you have a large database which needs additional room to grow. If this is the case, you will be forced to go with option #2 above.
« Setting up PV-Grub on your cloud servers. Creating backups for Cloud Servers larger than 2GB »


On Windows 2008 R2, I couldn’t find that file. But it’s just as easy going to Start – Administrative Tools – Computer Management, and the Disk Management section is right there.